MP1: The Room
Due: Feb. 12, 2020 @ 11:59 PM
Provided Material:
Important Notes
- Read the submission instructions carefully! If you are missing some files, but we can still grade, you will lose 20% of the total points. If we cannot grade your work due to missing files, you will receive no credit.
- Save your project onto the
U:drive, which is your EWS storage, and available across all of the computers in the lab. If you save to theC:drive, your project will only exist on that single computer. - If you use your own machine, make sure you use the version of Unity installed on all of the lab machines to avoid compatibility issues.
- To enable autofill in Visual Studio 2019, go to
Edit->Preferences->External Toolsand change theExternal Tools Script EditorfromOpen File ExtensiontoVisual Studio 2019.
Table of Contents
Creating a Project
Launching Unity should make the below window appear:

To create a new project, click the NEW button on the top right. Fill in the appropriate details to your heart’s content.
We provide the following suggested tutorials to help you familiarize yourself with Unity’s user interface.
The Room
Build a cubic room out of six planes. Make sure to orient these planes so the visible sides face inwards, and ensure that the player cannot walk through any of them. The room should be 15x15x15 Unity units (aka meters).
We will award extra credit for more complicated geometry.
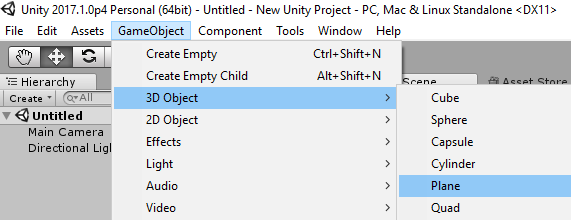
First, create a plane. It can be found in the top bar menus, under GameObject → 3D Object → Plane, as shown below.
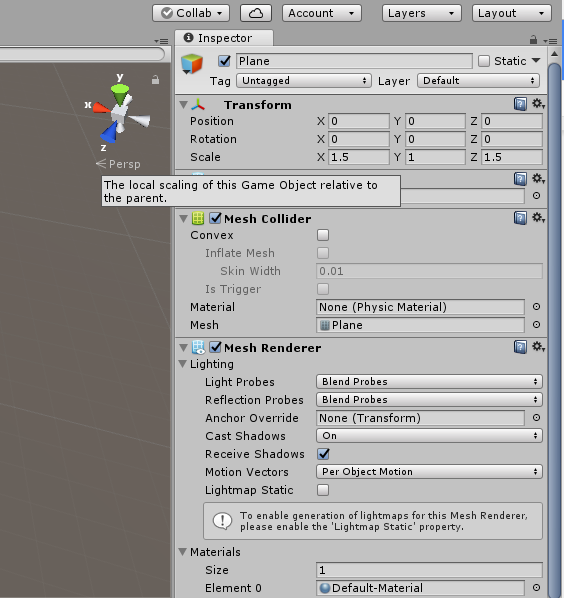
Unity’s default plane size is \(10 \times 10 \hspace{0.5em} (X \times Z)\) units. In order to make your room 15 units wide, you have to scale the plane. On the right side (in the default editor layout) you will find the Inspector window. This window provides details about the currently selected object. Select the plane in the Scene view, and the Inspector will fill with information and settings for said plane. Find the “Scale” option, and set the \(X\) and \(Z\) values to \(1.5\) to make your plane 15 units wide and long.
Note: The plane has no thickness, so the value in \(Y\) can be any positive integer.
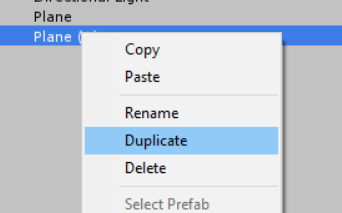
Now, to easily make the walls and ceiling, you can select your plane in the hierarchy, and duplicate it.
From there, simply change the new plane’s rotation and position to make it one of the walls or ceilings. Unity measures position from the center of the object, so if you want your walls to match up with the floor (at height 0), your walls will need to be at \(Y = 7.5\).
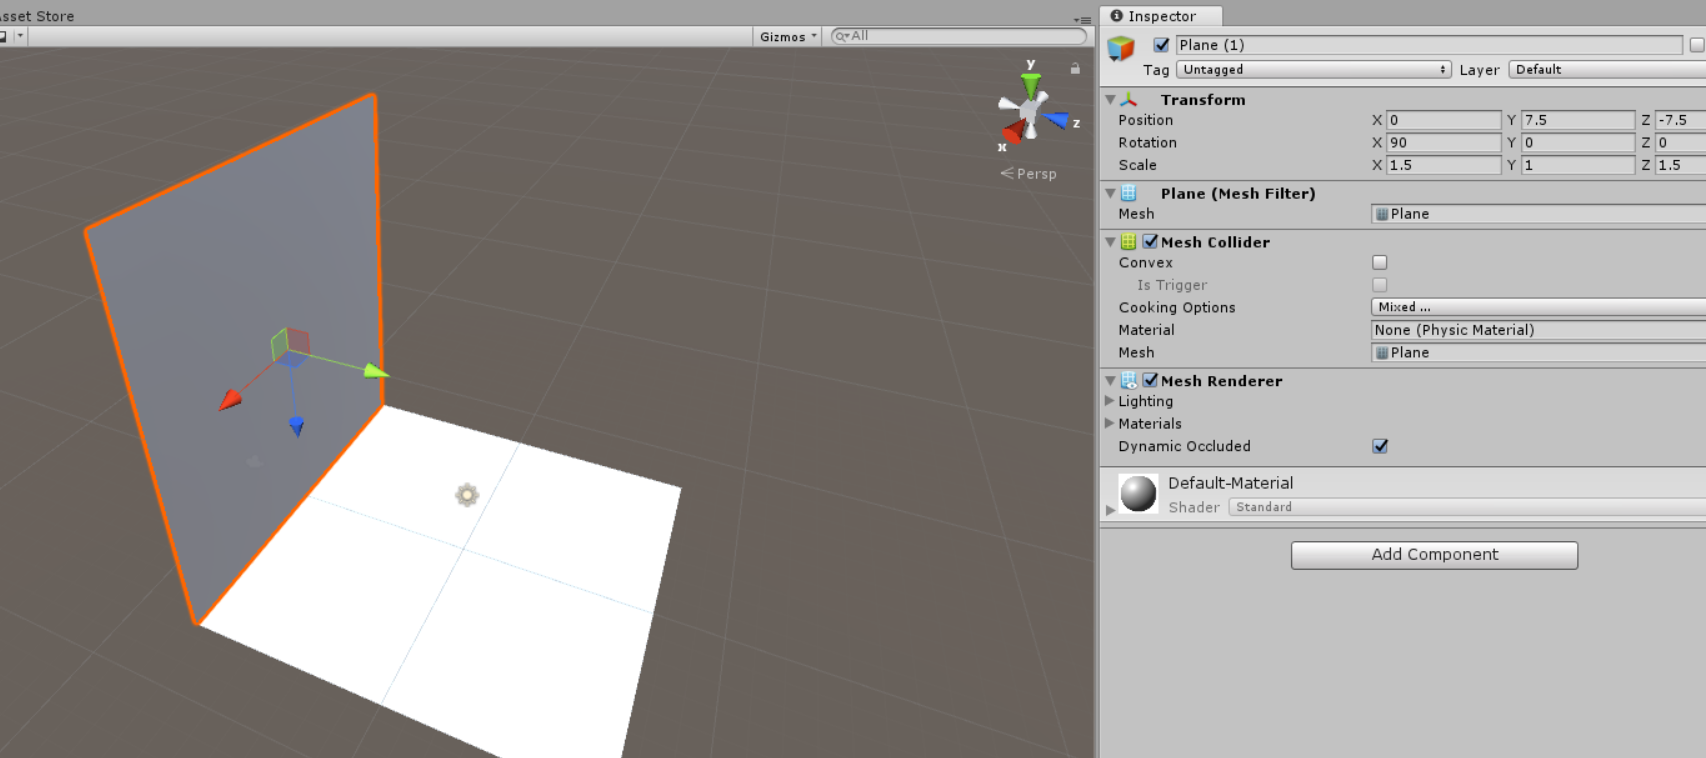
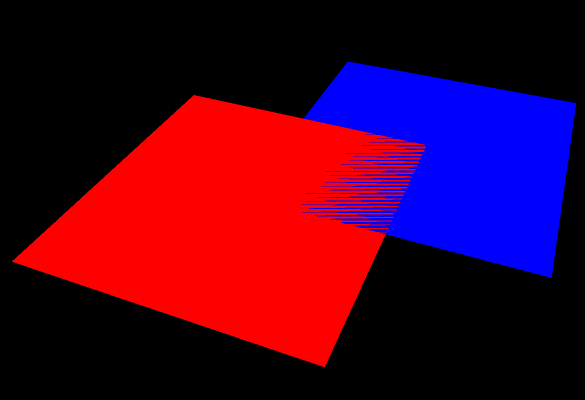
Note: In the image above, rotating the plane also rotated its axes (the blue \(Z\)-axis now points down). Make sure to account for that when rotating and moving objects!
Note: By default, your scene has a directional light in it, which illuminates your entire scene from a specified angle, from very far away, much like the sun. You’ll notice that your planes do not block this light. That’s because planes only block light (and render) from one side. Make sure that in your room, all six planes face inwards, and bear this in mind when creating objects in Unity in the future! For now, just delete the directional light. You will add more lights in later.
Store Asset
Import at least one free asset from the Unity Store and place it in the room. You will need a free Unity account for this.
In the bottom pane, go to the “Asset Store” tab, right next to the “Scene” and “Game” tabs.
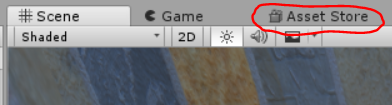
Sign into your Unity account using the “Log In” button at the upper right. Now, you can search for any free asset you desire, and put it in your room. It can be whatever you want (provided it’s school-appropriate, of course). Once you’ve imported an asset, drag it from the Asset tab into your scene.
VR Player Controller
Place an OVR Player Controller prefab in the room. This prefab handles basic movement, collision, and camera control.
The Oculus-related package is now in the Asset Store.
Search for, download, and import the “Oculus Integration” package.
We have also placed a copy of the package in the V: drive that you can import manually.
You should now have an Oculus folder in your Assets folder.
In this class, you will be primarily using two prefab objects from this package, both found in Oculus → VR → Prefabs.
The first prefab, the OVRCameraRig, is a camera for the Oculus, that handles all of the movement and position tracking for the oculus, as well as the rendering on the Oculus display.
The second prefab, the OVRPlayerController, is a more complicated version of the OVRCameraRig. It includes the camera from the OVRCameraRig, but also includes basic joystick movement controls, and a capsule-shaped collider that prevents the player from walking through solid objects.
Place an OVRPlayerController into your scene, at \((0,1,0)\), and delete the MainCamera object.
There’s just one more thing you need to do to finish enabling VR. Go to “Edit” → “Project Settings” → “Player”, which will open up the player settings in the inspector tab. In “XR Settings”, check the “Virtual Reality Supported” option. Now, when you play your scene, it should render inside the Oculus.
If you have issues importing, please check Piazza to see if others have had your issue, and make a post if you need more information.
Lighting
Place a point source of light at the center of the roof of the room. You will make this light change color by pressing the
Tabkey, which is detailed in the scripting section.
Create a point light (GameObject → Light → Point Light), and place it at \((0,15,0)\).
The inspector tab should have a Light component like this:
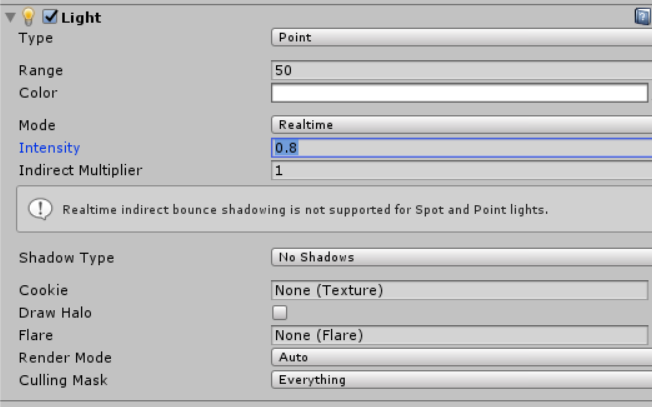
Of primary importance are the range (the radius of your light), color, and intensity values. Set the shadow type to “soft shadows”, and the mode to “Realtime”. Set your range and intensity so that your room is brightly lit.
We recommend reading the Unity manuals for general lighting, shadows, and lighting modes. In later MPs, and your course project, these settings can impact performance significantly.
Planet and Moon
Create a large sphere, and have it float in the middle of the room. Create another, smaller sphere, set it as a child object of the bigger sphere, and move it to be 4 units away from the larger sphere. You will make it orbit the larger sphere in the scripting section.
Create two spheres (GameObject → 3D → Sphere). Scale the first sphere to 2 in all directions, and place it in the center of your room. In the Hierarchy view, drag the second sphere onto the first. The result should look like this:
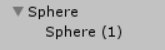
Now, the second sphere is a child of the first sphere. When you change the position, rotation, or size of the parent sphere, its child will also undergo the same movement, rotation, or scaling. The \((0,0,0)\) origin position of the child is now its parent’s position, not the global \((0,0,0)\) origin. That is, the child’s position is an offset from the parent’s position. Finally, if the parent rotates, then the child will rotate about its parent’s axes, not its own axes (this will make more sense later). See the Unity hierarchy manual for more information.
Set the position of the child sphere to be \((2,0,0)\), which is 4 units from the parent sphere on the X-axis. For why this is, think about the scaling of the parent sphere.
Text
Put large text on a wall, listing your NetIDs and the details of the controls (which you will make later). Feel free to experiment with what you can put on a canvas, but keep it grandmother appropriate!
Check out the Unity tutorial on Creating Worldspace UIs. Create a text canvas (GameObject → UI → Text).
This will create a rectangular canvas parent object with a child text object. The canvas should look like this in the inspector tab:
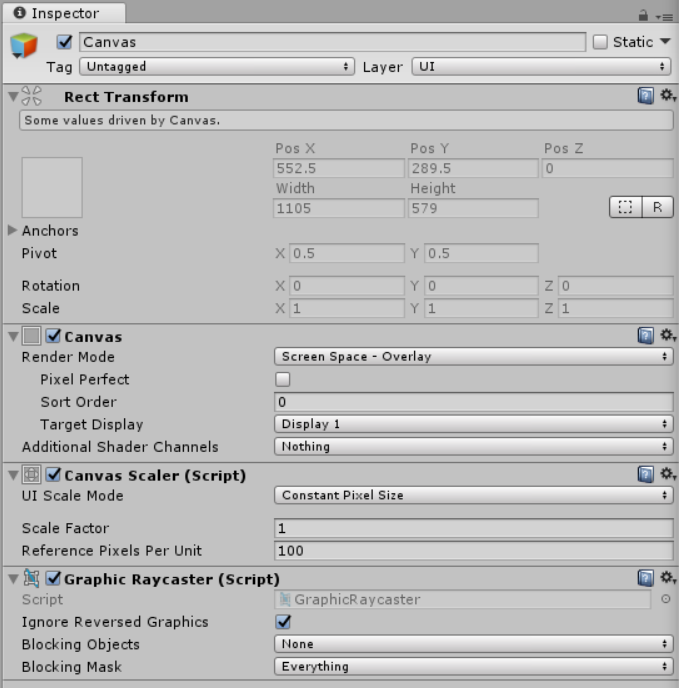
First, change the Render mode from Screen Space - Overlay, to World Space.
This changes the canvas from a UI element glued to the camera, to an object that is stationary in the world.
Traditional UIs do not work well in VR, and we strongly discourage sticking any UI elements to the camera in your future MPs and Projects.
Always attach UI elements to something in the world (see this).
Now that the canvas is a world space object, we can make it a more reasonable size. However, since the width and height of the “Rect Transform” component are in units of pixels, not world units, we must first set the resolution of the canvas. Set the width and height to 1000 (i.e, \(1000 \times 1000\) pixels). Now, shrink the canvas by setting the scale. Multiplying the canvas width and height by the scale factors gives the actual size of the canvas in world space. For example, since we set the canvas to be of size \(1000 \times 1000\) pixels, using scaling factors of \(0.01\) would make the canvas \(1000 * 0.01 = 10\) units large in world space. Make sure your text’s Rect Transform has the same width and height as its parent canvas, but leave the scale as 1.
Now, you can place your canvas against one of the walls. Offset it a small amount (e.g., 0.001) off of the wall against which it is placed. This avoids Z-fighting, which happens when two objects have the same depth, and Unity can’t figure out which one to render. Below is an example:
Now, you can set your text color, size, font, width, whether it wraps or overflows, etc. Make your text has you and your partner’s NetIDs, as well as the controls for your game (more on this later). Make sure it is big enough for us to read. If the text appears blurry or jagged, then increase the width and height of the canvas and text (to increase the resolution), and scale them down further.
Skybox
Create a skybox using the images in
skybox.zip.
Follow the instructions in the Unity skybox manual to set up the skybox. Since the room is currently enclosed, you won’t be able to see the skybox from the room. We will remedy that in the scripting section.
The skybox is from mgsvevo.
Material
Use the provided image (
tile.png) and normal map (tile-normal.png) to color two of the walls, with different tiling, metallicity, and smoothness settings. Make a solid color material and apply it to a third wall. All of the walls must be obviously visually distinct.
Read the Unity materials, shaders and textures manual, focusing mainly on the Materials, for now.
We have provided a base texture (tile.png), and a normal map (the weird purplish image tile-normal.png).
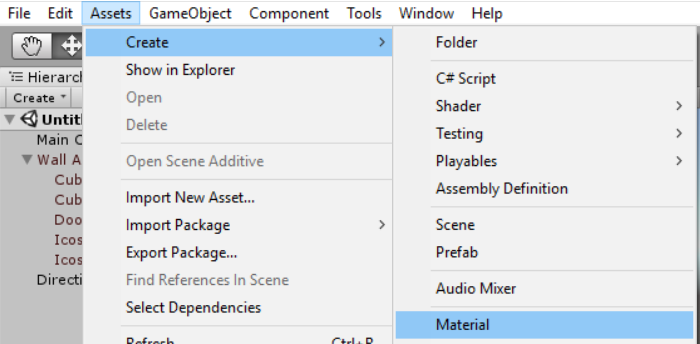
To create a material, go to Assets → Create → Material.
This will generate a default material, which should show up in the inspector tab like so:
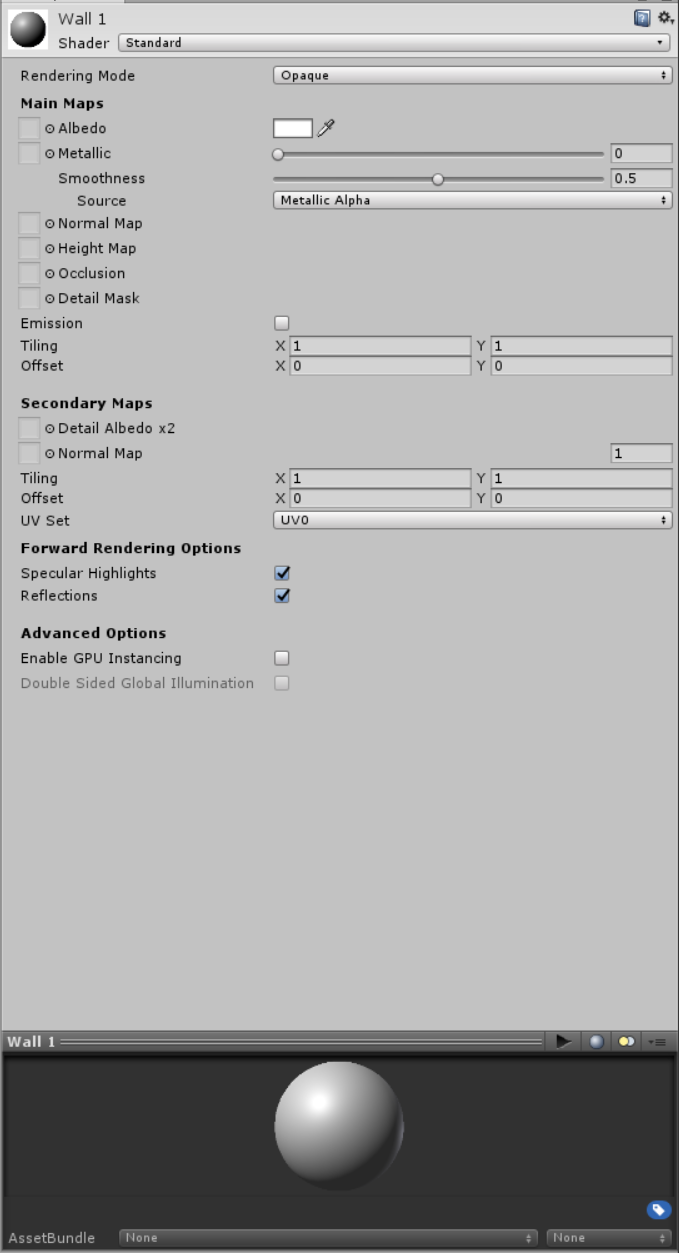
Drag the tile.png image to the box labeled “Albedo”.
Now, drag this material from the assets folder onto one of your walls in the Scene view.
It probably doesn’t look too good. Don’t worry, it’ll get better.
Drag the tile-normal.png image to the box labeled “Normal Map”.
Notice how it changes the perceived material of of the material. A normal map is a trick used to give the illusion of depth on a flat surface,
by telling the engine to reflect light as if there were these little bumps and pits in the material.
Apply this material to a wall by dragging it onto a wall.
Create a new material, called Wall 2, apply the same albedo and normal maps as you did Wall 1, and apply it to a different wall.
Right above the “Secondary Maps” subheading is the “Tiling” option, which has an option for x and y.
Tiling causes a material to repeat itself on the same object, rather than covering the whole thing.
So, changing tiling x to 2, means that the material will show up twice, in the \(x\)-direction on the wall.
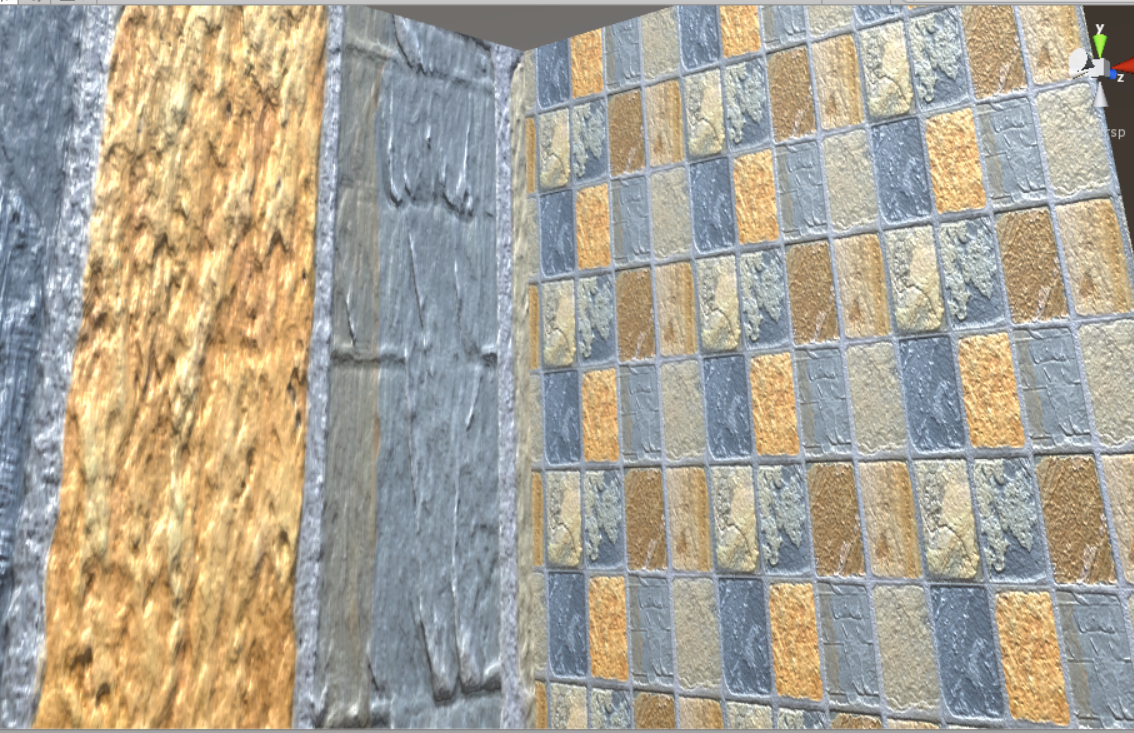
Play with the tiling until you like the look of it.
Below is an example of non-tiled and tiled walls side by side.
In the inspector tab, right below the albedo option, there are metallic and smoothness sliders. Play around with these, and see how they affect the material. The metallic slider adjusts the reflections, and smoothness helps to enhance or subdue the normal map. Modify the metallicity and smoothness of the two wall materials so that they are clearly visually different.
Finally, create a material, that has no albedo or normal map. Next to the albedo option is a small color box. Since this material has no albedo, the material will be this flat reflection color. Try and see what happens when you change the color of a material with an albedo. Apply this flat color onto a third wall in the room.
Scripting
Unity scripts use the C# language. If you are unfamiliar with programming, you can check out this C# tutorial. You’ll only need the basics of objects, classes, and variables for now.
We recommend reading the Unity scripts manual and the Scripting Reference. For the first few scripts, we will detail the functions that we recommend, but after that, we expect that you will refer to the API reference to search for whatever you require.
Side Note: Input in VR
Keyboards do not work well in VR, since the VR environment means that you cannot see the keyboard, and all of the keys largely feel the same. Controllers, with their contours and designated button shapes, are much easier to use blind. Refer to the following pages for more information, which you will need when you write the scripts below:
- Unity Input
- OVR Input: general explanation, API reference
Your control scheme must use the Oculus controller, not the keyboard. You must also tell us what your control scheme is!
Quit Key
Set up a button on the touch controllers to exit the game.
Create a new script using the Assets menu.
To attach the script to an object, select the object, then drag the script from the assets tab to the inspector tab.
Alternatively, you can create and attach a script in one step using Add Component → New Script.
For this script, the exact object attached is unimportant.
When a Unity script is attached to a GameObject, that script will run when the game is started.
Furthermore, the this reference in the script will refer to the object to which the script is attached.
In your script, you will need to use the OVRInput library and the OVRInput.GetDown function, which only returns true on the frame when the specified key is first pressed down. Think about what would happen if you used the “get” variants instead.
Since we want to always check for input, add an Update function to your script, which is called every frame.
Then, insert the below code:

Application.Quit() quits a Unity application, but it will not stop a game running in the editor.
Thus, we use an #if and a Unity-specific preprocessor directive
that adjusts its behavior depending on whether the project is within the editor, or a standalone executable.
Light Switch
Set up a button on the controllers that changes the color of the point light in the room. The color should change every time you press this button, i.e. have it be a toggle or a switch between a series of colors. Make sure that the color change is large enough so it is immediately apparent!
Make a script and attach it to the point light.
Our first step is to get the Light component of our point light GameObject.
Read the Controlling GameObjects using Components tutorial, then add these lines to your script:

The Start function runs as the game initially starts. Since the script and the light component are both on the same object, this script effectively initializes a reference to our light component object.
Alternatively, you can declare public GameObject variables. Save your script, then navigate to the script in the inspector pane.
The variable will show up in the inspector pane, and you can assign GameObjects to it by dragging them from the hierarchy tab into the variable slot!
This works similarly for other variable types.
You can read more about this in the Variables and the Inspector tutorial.
To change the color of the light, you must modify the color instance variable. You can either create a new color using the new Color(red, green, blue) constructor, or use one of the predefined colors. You can detect controller input using largely the same method as you used to implement the quit key, but be sure to use a different button!
Orbiting Moon
Make the moon orbit the planet sphere at a steady rate, just like in actual planetary systems.
The easiest way to do this is to have the planet object constantly rotate. Since the moon object is a child of the planet object, it will also rotate around the planet. (We don’t care about tidal lock here.)
You can control the rotation and position of a GameObject with the transform object variable, an instance of the aptly named Transform class.
Use the functions of this class to rotate the planet system around the \(Y\)-axis.
Beware that the Update function runs every frame, but frames often vary in real elapsed time.
Thus, using static rotation amounts with the Transform class will make the apparent rotation speed depend on frame rate.
This is generally not desirable.
To use realtime frame times instead, use the Time.deltaTime variable.
When used inside the Update function, this variable’s value is the real time in seconds that elapsed since the last frame.
See the Time and Frame Management page for more information.
Trigger Zone
Place a suspended sphere in a corner of the room. Trigger the sphere to drop when the player moves under the sphere.
You may find the Unity colliders manual and video tutorial helpful.
Colliders register and react with collisions with other GameObjects in the physics engine.
Colliders can also behave like triggers, which fire whenever a GameObject intersects the collider,
but do not otherwise alter physics.
Create a new empty GameObject, go to Add Component → Physics → Box Collider,
and then check the “Is Trigger” option.
The collider should show up in the scene view as a green wireframe.
Make sure that no other objects intersect the collider initially!
Add a script to your collider object, and implement the function called when something enters the trigger. Again, pay attention to the subtlety between when something enters the trigger and when something is within the trigger. To actually make the sphere fall, enable gravity on the Rigidbody, a physics component, of the sphere.
Break Out
Set up a button on the controllers to switch the player’s position between an external viewing point and the room.
Like all GameObjects, the player object has a Transform.
However, the player object also has a collider, and as an optimization system measure,
Unity does not automatically propagate changes you make on the Transform component out to the physics system.
See Physics.autoSyncTransforms
or Physics.SyncTransforms
for more justification, and methods to propagate those changes. (For objects with a Rigidbody, you should change Rigidbody.position instead.)
Make a script that switches the player between a room and a new external viewing point, e.g. a small new plane a moderate distance from the room. The player should still start within the room. Pressing the button for the first time must move the player to the external viewing point. After that, pressing the button must alternate between the two locations.
Remember that the coordinates for the player refer to its center, and the player is 2 units tall. Thus, the player controller needs to be 1 unit above the ground.
A More Interesting Room
For extra credit, instead of the cube room we described above, use a modelling tool to create more complicated room geometry, like a curved roof, slanted windows, multiple levels, et cetera. Your creation still needs to have the other features of the room we described above.
Some software options are, in descending order of complexity:
- Blender: powerful and complicated
- Sketchup Free: browser-based modeling tool
- ProBuilder: integrated directly into Unity
We highly recommend you familiarize yourself with one of the above tools because it will assist you greatly in your final project. To get the extra credit, you must do a nontrivial amount of extra work with your modelling tool. That is, it should look like it took you more than 5 minutes to do.
Submission Instructions
Step 1: Create a Unity package file
- Save your Unity scene in the Assets folder with a descriptive title.
- Using the editor, find the created scene in the Project menu
- Right click on the scene and select “Export Package…”
- Export the file using default settings. Make sure that “Include dependencies” is enabled.
- This will create a
.unitypackagefile. We may use this during grading if your executable does not work, so make sure you also submit the data folder.
Step 2: Create a standalone build
- Save the project to
C:\Users\<your netid>\<project name>temporarily, rather than the EWSU:drive. Local storage is faster when building. - Go to Edit → Project Settings → Player. Make sure the “Virtual Reality Supported” box under XR Settings is checked.
- Go to File → Build Settings.
- Open the scene with your work for the MP.
- Click “Add Open Scenes”. You must have saved the scene to the assets folder for this to work.
- Click “Build”.
- This will create an executable (
.exe) for running the build, a folder containing your scene data, a “Mono” folder, andUnityPlayer.dll.
Step 3: Copy the Input Manager file
- Shut down your project.
- In your project folder, navigate to the
ProjectSettingssubfolder. - Find the
InputManager.assetfile, and copy it to your submission folder. This will allow us to replicate any new gamepad buttons or joysticks you mapped.
Step 4: Zip the files and submit through Compass
- Create a zip file containing the following items:
- The
.unitypackagecreated in Step 1 - The
.exe,.dll,Mono, AND DATA FOLDER created in Step 2 - The
InputManager.assetfile found in Step 3 - A
README.txtfile containing any instructions or notes relevant for evaluating your assignment.
- The
- Ensure that the executable in your submission folder runs correctly on the Rift before submitting. The easiest way to do this is to unpack the zip file into a new folder, and then run the executable.
- Name the file by separating NetIDs with underscores-
_cs498vr_MP#_part#.zip. EXAMPLE: Ifsteve1andanna2worked together, the file for MP 1.1 should be calledsteve1_anna2_cs498vr_MP1_1.zip. - Only one partner should submit the resulting file.
Rubric
| Name | Points | Description |
|---|---|---|
| The Room | 10 | The room is complete and enclosed. |
| Store Asset | 10 | A Unity Store asset is present. |
| Lighting | 10 | A bright point light is in the center of the room ceiling. |
| Planet and Moon | 10 | A planet and moon orbit in the room. |
| Text | 10 | Text is sharp and displays NetIDs and controls. |
| Skybox | 10 | A skybox is viewable from the external vantage point. |
| Material Maps | 5 | Two walls have the provided albedo and normal maps. |
| Material Tiling | 5 | Two walls have distinct tiling settings. |
| Material Properties | 5 | Two walls have altered smoothness and/or metallicity. |
| Flat Color Material | 5 | One wall has a flat color material. |
| Quit Key | 10 | A controller button exits the game. |
| Light Switch | 15 | A controller button changes the light color. |
| Orbiting Moon | 15 | The moon orbits the planet at a steady rate. |
| Trigger Zone | 15 | A trigger zone is present that drops a suspended sphere. |
| Break Out | 15 | A controller button switches the player to and from an external vantage point. |
| Room Geometry | 15 | Built nontrivial room geometry (extra credit) |
| Total | 150 |